
Good day all, I hope you’ve all had a good week. This past week has a been a pretty important week for us as we (finally) had the Copper Canyon Shoot Out launch on PS VR in the Americas, we had already done a soft launch in Europe, but this was the point that we really needed to start pushing it. So yeah that was fun :) But we already a have a full post on that launch here, so this post will be about the tech in You’re Doomed.

This week we’ve been looking at ways of increasing the efficiency of our character and animation pipelines. When we started the studio we knew right away that we wanted to have a unified character skeleton for all our animatable characters, as this would mean that everyone here would always know what a joint’s name was and where and how many joints to have in a skeleton; This would remove confusion and therefore time when creating a character’s skeleton. But the primary reason for this was that if all of the skeletons where the same then I could automate the animation rigging process, shaving days off the time needed to prepare a character for animation.

(Side note: For those that don’t know the pipeline and definitions for animating a 3D character, a simplified version of this is below:
Create the mesh – Create the 3D polygon mesh for the character.
Create a skeleton – A virtual skeleton has to be created in side the character’s mesh, each joint in the skeleton needs to be named, positioned, and orientated.
Skinning – This process is where the 3D mesh is attached to the skeleton, it is where an artist chooses which parts of the mesh and moved by which joints.
Rigging – We don’t animate the skeleton directly, instead we create a series of controls around the character and animate these instead, think of it like 3D puppeteering.)
This week we were thinking about this and how hard it would be to re-target animations between each character, because if they all have the same skeleton then potentially they could all share animations, reducing the amount of animations we would have to create. This would also mean that we would only have to actually rig a couple of characters for animation, instead of all of them, reducing the time cost even more.
The Unreal Engine has a few animation retargetting options, but if all the characters have the same skeleton then they can share the same UE4 skeleton asset and therefore animations (see this tutorial here). So to test this we through together a quick run animation on the new Buck character, because he was already rigged for animation. And then in the Unreal Engine we tried running this one animation on both Buck and Dirk (as Dirk was already skinned), and thankfully it was success!
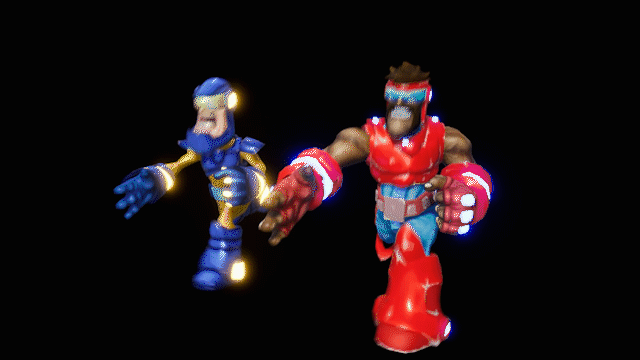
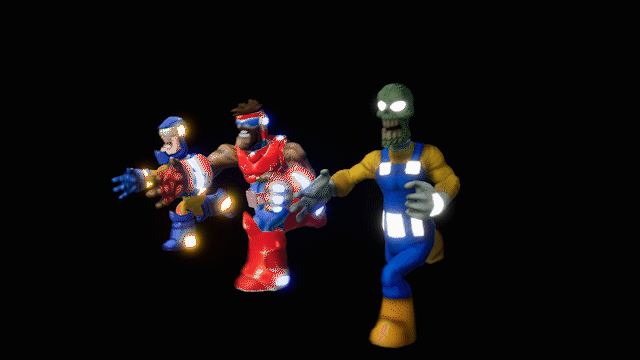
However Buck and Dirk’s skeletons are very similar in terms of each joint’s position, so we still needed to test this on a more extreme scenario. Jon had already completed the infected horde models, and there is a tall infected now, a skeleton in this model would be quite different from Buck and Dirk’s. So we spent a day creating a skeleton for the tall infected horde character and skinning the character to this skeleton. And then in the Unreal Engine we could test the run animation on this tall infected character.
With this new pipeline were should be able to dramatically reduce the complexity and the time involved in creating animations for You’re Doomed, and I can’t wait to have these final characters in the game. The next few weeks are going to be super exciting.
See you all next week,
Jules.